Follow Me On Social Media!
KitchenAid Pizza Dough Recipe: The Best Homemade Crust Ever
Introduction to KitchenAid Pizza Dough Recipe
Have you ever experienced the divine satisfaction of a hot, freshly baked pizza with a crust that’s crispy on the outside and soft on the inside? With a KitchenAid pizza dough recipe, you can recreate that beloved experience at home, right in your own kitchen. Imagine rolling out a perfect dough, the aroma mingling with your favorite toppings, and pulling a piping-hot pie from the oven, bubbling and golden. This is more than just a meal; it’s a chance to gather friends or family for a fun night in—a culinary journey that leads to deliciousness.
Homemade pizza dough isn’t just about saving money; it’s an opportunity to customize flavors and textures according to your preferences. Using a KitchenAid mixer to knead the dough means you won’t have to break a sweat, leaving you more time to experiment with toppings or practice your pizza-tossing skills (or simply eat). The added benefit of making your own dough is the knowledge of what goes into it—fresh, simple ingredients without any additives or preservatives.
What makes homemade pizza dough a must-try?
-
Quality Control: When you make your own dough, you have complete control over the ingredients. You can opt for high-quality flour, sea salt, and pure water, ensuring that every bite is as delightful as the last.
-
Customization: Want a whole grain crust? No problem. Prefer a blend of flours for a unique flavor? Easy! You can experiment with different types of flours or adjust the hydration levels to suit your taste.
-
Freshness: There’s something truly special about dough made from scratch. Fresh dough means fresher flavor. Plus, once you’ve mastered the art of pizza-making, the sky’s the limit—think gourmet toppings or special sauces that elevate your pizza game.
-
Fun and Bonding: Making pizza at home can be a fantastic social activity. Gather friends, prepare toppings together, and enjoy the process of crafting your delicious custom pies.
With the KitchenAid pizza dough recipe, you’re not just whipping up dinner; you’re creating experiences. So roll up those sleeves, and let’s dive into the delicious world of homemade pizza!

Key Ingredients for KitchenAid Pizza Dough Recipe
Creating the perfect KitchenAid pizza dough recipe begins with selecting the right ingredients. Each component plays a vital role in achieving that chewy, flavorful crust that enhances your pizza experience.
-
Flour: For an ideal texture, I recommend using high-protein bread flour. Its gluten content gives the dough strength and chewiness, ensuring a satisfying bite. You can certainly use all-purpose flour if that’s what you have on hand, but your crust may be slightly less chewy.
-
Yeast: Fresh yeast is what makes the dough rise beautifully. Instant yeast is a great option for convenience, as it can be mixed directly into the dry ingredients without proofing, saving you time in the preparation process.
-
Water: The temperature matters! I use lukewarm water (around 110°F) to activate the yeast effectively. This warmth encourages a faster rise, giving you a light, airy dough.
-
Salt: Salt is crucial, not just for flavor but also for regulating the yeast’s activity. It enhances the overall taste while keeping your dough balanced.
-
Olive Oil: A splash of good-quality olive oil adds richness and helps keep the dough tender. It also makes the crust a little crispier during baking.
By combining these foundational ingredients in your KitchenAid pizza dough recipe, you’ll create a delightful base perfect for any topping you desire. Every bite will speak volumes about the care you’ve put into crafting your pizza.
Why You’ll Love This Pizza Dough Recipe
Every pizza lover knows that the foundation of a great pizza lies in its dough, and this KitchenAid Pizza Dough Recipe delivers just that! Imagine moving past generic takeout to creating a warm, soft crust in your own kitchen, filled with bubbling cheese and your favorite toppings. Beyond simply satisfying your cravings, making your own dough offers a delightful culinary journey and a satisfying sense of accomplishment.
The Benefits of Making Your Own Dough
Crafting your own pizza dough is not just a trendy culinary skill; it’s a shortcut to deliciousness. Here’s why you’ll love it:
-
Freshness and Flavor: There’s nothing like the smell of freshly baked dough wafting through your kitchen. Homemade dough, free from preservatives, delivers a flavor that pre-packaged alternatives simply can’t match.
-
Customization: With this recipe, you can easily tweak the ingredients to suit your taste. Want a whole wheat crust? Go for it! Need a gluten-free option? Just substitute the flour.
-
Cost-Effective: Making your own dough is often cheaper than store-bought alternatives, plus it allows you to control the ingredients and avoid hidden costs.
-
Less Waste: By making dough in small batches, you’re less likely to waste food, and you can always freeze leftover dough for a future pizza night.
Enjoy the satisfaction of crafting the perfect base for your culinary masterpiece with this KitchenAid Pizza Dough Recipe! It’s not just about pizza; it’s about the love you put into making it.

Tips for Making Perfect Pizza Dough
Creating the ideal pizza dough from the KitchenAid Pizza Dough Recipe can feel like a rite of passage in your home kitchen. As someone who started with store-bought crust, I can assure you that the joy of crafting your own dough is entirely worth the effort. Here are some essential techniques to elevate your dough-making game.
Essential techniques for success
-
Use the Right Flour: I recommend opting for bread flour because it has a higher protein content than all-purpose flour, resulting in a chewier crust.
-
Temperature Matters: Ensure that your water is lukewarm, around 110°F (43°C). This temperature activates the yeast effectively without killing it. Remember, temperature can be the difference between a bubbly crust and a flat disappointment.
-
Kneading is Key: When using your KitchenAid mixer, aim for about 5 to 7 minutes on medium speed. This process develops gluten, creating that coveted elasticity.
-
Let It Rise: Allow your dough to rest in a warm place for at least 1-2 hours. This step not only makes it easier to stretch but also enhances flavor.
-
Don’t Rush It: Once you shape your dough, letting it rise again is crucial. A second rise for about 30 minutes allows for those air pockets to develop, giving you a delightful chewiness.
Perfecting dough isn’t just about following a formula; it’s an art that gets better with practice. Enjoy the process, and soon enough, you’ll be impressing your friends with your homemade pizza nights!
Time Breakdown for Pizza Dough
Ready to dive into your KitchenAid Pizza Dough Recipe? Understanding the time involved can help you manage your kitchen tasks like a pro. Here’s a quick breakdown to keep your pizza night smooth and enjoyable!
Preparation Time
The initial preparation takes about 10 minutes. You’ll measure, mix, and knead your dough, letting the KitchenAid do most of the work. It’s a minimal time investment for a delicious payoff!
Rising Time
After prepping your ingredients, you’ll need to let the dough rise for about 1 to 1.5 hours. This step is crucial, as it allows the yeast to work its magic, creating that airy texture we love in pizza crust.
Baking Time
Once your dough is ready and topped, it typically takes around 15-20 minutes to bake. Keep an eye on it—your oven will give you hints as it starts to turn a lovely golden brown!
Total Time
All together, you’re looking at approximately 1.5 to 2 hours from start to finish, which includes hands-on prep and the waiting time for the dough to rise. With just a little patience, you’ll have a scrumptious homemade pizza to enjoy!

Nutritional Information for Pizza Dough
Understanding the nutritional profile of your homemade KitchenAid Pizza Dough Recipe can help you enjoy your favorite dish mindfully. Here’s a quick glance at what’s packed into your dough:
Calories
A typical serving of this pizza dough contains around 120 calories. This makes it a delicious base without overwhelming your meal.
Carbohydrates
With approximately 24 grams of carbohydrates per serving, this dough provides the perfect energy boost for your pizza night.
Protein
Each serving offers about 4 grams of protein, contributing to the overall nutrition of your pizza.
Fat
The dough contains around 2 grams of fat, allowing you to enjoy a tasty treat while still keeping it balanced.
Sodium
With roughly 200 milligrams of sodium per serving, this pizza dough is flavorful without being overly salty, making it a great choice for those watching their sodium intake.
This information can assist you in crafting not just a delicious pizza but a nutritious one as well!
FAQs about KitchenAid Pizza Dough Recipe
The KitchenAid Pizza Dough Recipe opens the door to a world of flavorful creations from the comfort of your kitchen. As you embark on your pizza-making adventure, you might have a few questions about the process. Here are the most common queries to help you get the best results.
Can I use all-purpose flour instead of Tipo 00 flour?
Absolutely! While Tipo 00 flour is ideal for pizza because of its fine texture and high protein content, all-purpose flour is a fantastic substitute. You may not achieve the same level of chewiness that Tipo 00 provides, but your pizza will still turn out deliciously. Just remember to adjust your hydration levels, as all-purpose flour can absorb moisture differently.
How long can I store pizza dough in the freezer?
If you’re looking to make your pizza dough ahead of time, freezing it is a great option. Wrapped tightly, your pizza dough can last up to three months in the freezer. When you’re ready to use it, transfer it to the refrigerator the night before to thaw slowly, and let it rise at room temperature before shaping and baking.
What if my dough is too sticky or dry?
Finding the right texture is key! If your dough is too sticky, try adding a bit more flour, one tablespoon at a time, until you achieve the desired consistency. Conversely, if it feels dry or crumbly, add water or olive oil gradually, mixing until the dough is soft and smooth. Trust your instincts—each batch can vary!
Can I use active dry yeast instead of instant yeast?
Of course! You can substitute active dry yeast for instant yeast in your KitchenAid Pizza Dough Recipe. Just remember to activate it in warm water for about five to ten minutes before mixing it with the other ingredients. This step ensures that your yeast is alive and ready to help your dough rise beautifully.
Conclusion on KitchenAid Pizza Dough Recipe
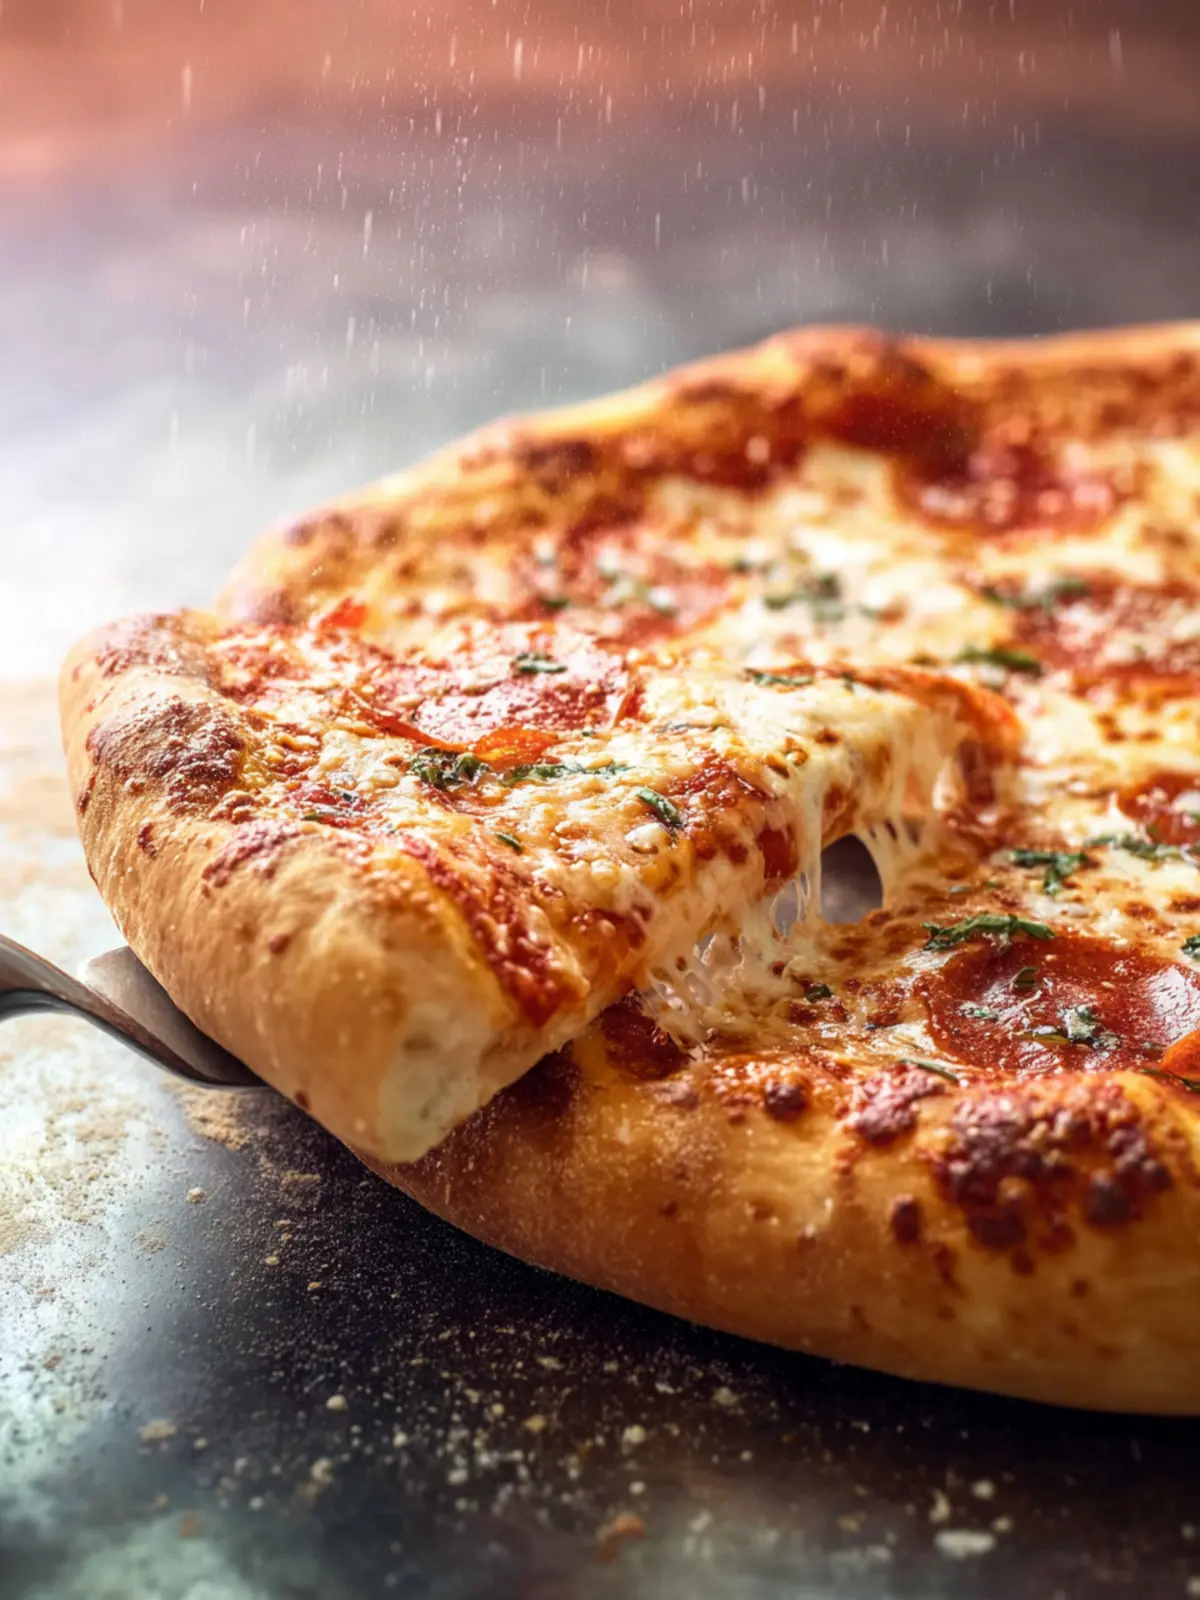
Crafting a delicious pizza starts with the perfect dough, and the KitchenAid Pizza Dough Recipe is a fantastic way to achieve that. With just a few simple ingredients—flour, yeast, salt, water, and olive oil—you can create a base that is both light and chewy. Once you’ve mastered the technique, consider experimenting with your toppings and sauces. Isn’t it delightful to customize your pizza just the way you like it? Remember, practice makes perfect! So don’t hesitate to make this recipe your go-to, and watch how it transforms your pizza nights into something truly special. Enjoy every bite!
Print
Easy Homemade Pizza Dough
- Total Time: 1 hour 15 minutes
- Yield: 2 pizzas 1x
- Diet: Vegetarian
Description
A simple and delicious homemade pizza dough recipe.
Ingredients
Scale
- 450 grams (3 cups) Tipo 00 or all-purpose flour
- 2 teaspoons instant yeast
- 1/2 tablespoon olive oil
- 3/4 teaspoon kosher salt
- 1 1/3 cups warm water
- to taste Cornmeal
Instructions
- Start out by watching our Easy Homemade Pizza Dough Video to get a feel for the process.
- In the bowl of a stand mixer, combine all ingredients (except cornmeal). Leave out a small amount of the water.
- Using the dough hook from the mixer, stir until a loose dough forms. If a dough doesn’t form, add the rest of the water. If the dough is extremely wet and sticky, add a pinch of flour.
- Attach the dough hook to the mixer and start on a low speed. Gradually increase the speed to medium-low until a ball forms. This should take about 30 seconds. If the dough does not release from the sides of the bowl, add a pinch of flour. If the dough is very dry and floury, add a small amount of water.
- Once the dough forms into a ball, allow the mixer to knead for 8 minutes at medium-low (or according to your mixer instructions).
- After the kneading is finished, divide the dough in half. Using floured hands, gently shape each dough into a boule. Set each boule on a floured surface and dab with a little bit of olive oil to keep moist. Cover with a damp towel and allow to rise for 45 minutes to 1 hour.
- To stretch the dough, pick up the risen dough and gently shape it into a circle. Do not over-work or fold the dough. Drape the dough over both of your knuckles and rotate it around, allowing gravity to stretch it into a circle. If the dough starts to resist stretching, put it down and allow it to rest for a few minutes, at which point it will stretch more easily.
- Sprinkle a little bit of cornmeal onto a pizza peel or rimless baking sheet. Place the stretched dough onto the peel and quickly add toppings. Cook at 500° for 5-7 minutes until browned. Enjoy!
Notes
- This dough can be frozen if not used on the day of preparation.
- Prep Time: 15 minutes
- Cook Time: 7 minutes
- Category: Main
- Method: Baking
- Cuisine: Italian
Nutrition
- Serving Size: 1/2 pizza
- Calories: 260
- Sugar: 1g
- Sodium: 200mg
- Fat: 4g
- Saturated Fat: 0.5g
- Unsaturated Fat: 3g
- Trans Fat: 0g
- Carbohydrates: 52g
- Fiber: 2g
- Protein: 9g
- Cholesterol: 0mg